ProfileMap Release Notes
Release date: 17-01-24
Table of Content
2 Highlights
3 Staffing Request
3.1 Staffing Request Navigation
3.2 New layout of Summary Table
3.3 Changes to Staffing Request Summary Table
3.4 New Filter functionality in Summary Table
3.5 Creating new Staffing Request – New Window
3.6 Data Extraction Assistant
3.7 Comment section is separate tab
3.8 Document upload against request
3.9 Staffing Request Search
3.10 Changes to the Search functionality
4 Workflow to allow access to anonymized profiles
4.1 Request access to profile
4.2 Access Requests Task List
4.3 Inbound Requests (Requests Received)
4.4 Edit inbound request
4.5 Approving a request
4.6 Profile Visibility Changes
4.7 Access Your Task List
5 Login without SSO
5.1 New login page
5.2 Registration via Upload
2. Highlights
- Requests
- New Request Navigation: We’ve introduced a revamped navigation system with new tiles for Staffing Request, making it easier than ever to access and manage your staffing requests.
- Enhanced Summary Table: The Summary Table layout has been redesigned, featuring a new button for creating „Staffing Requests“ and improved filter functionality. This will streamline your request management process.
- Search and Match Improvements: The search and match functionality has been enhanced to provide better candidate matching based on your specified criteria, improving your candidate sourcing efficiency.
- Automated Data Capture: We’ve added a „Search & Request Assistant“ tool, allowing for automated document processing and easy transfer of text-based information into the search & request fields.
- Improved Document Management: You can now upload documents directly against your request, making it more convenient to associate relevant files with your staffing requests.
- Streamlined Comment Section: We’ve separated the comment section into a dedicated tab for better organization and ease of use.
- Workflow to access profiles
- Login without SSO
3. Request
3.1 Request Navigation
New Navigation: We’ve introduced a new and intuitive navigation system with dedicated tiles for Staffing Request, making it simpler to access and manage your staffing requests.
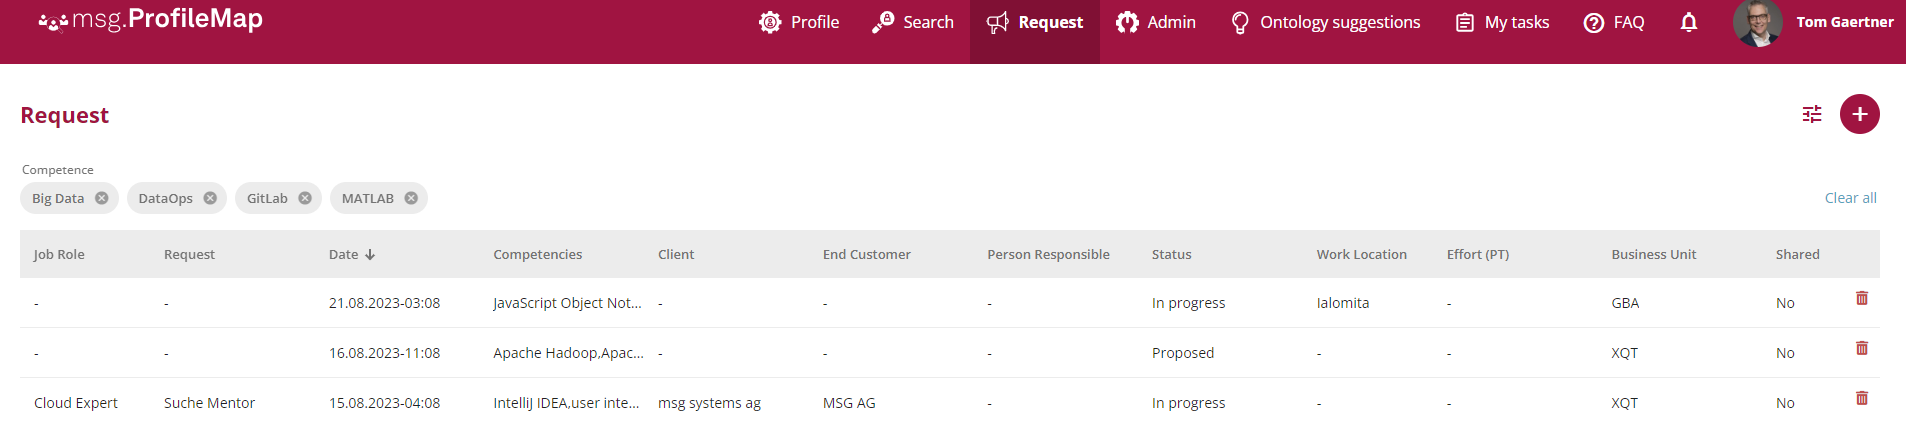
3.2 New layout of Summary Table
Revamped Summary Table: The Summary Table layout has been updated to provide a more user-friendly experience.
New „Create Staffing Request“ Button: Now, you can easily create new staffing requests with the click of a button.
Improved Filter Functionality: We’ve enhanced the filter functionality, allowing you to refine your search based on various criteria.
3.3 Changes to Staffing Request Summary Table
Replaces Saved Searches: We’ve replaced the previously saved searches with an improved system for better request management.
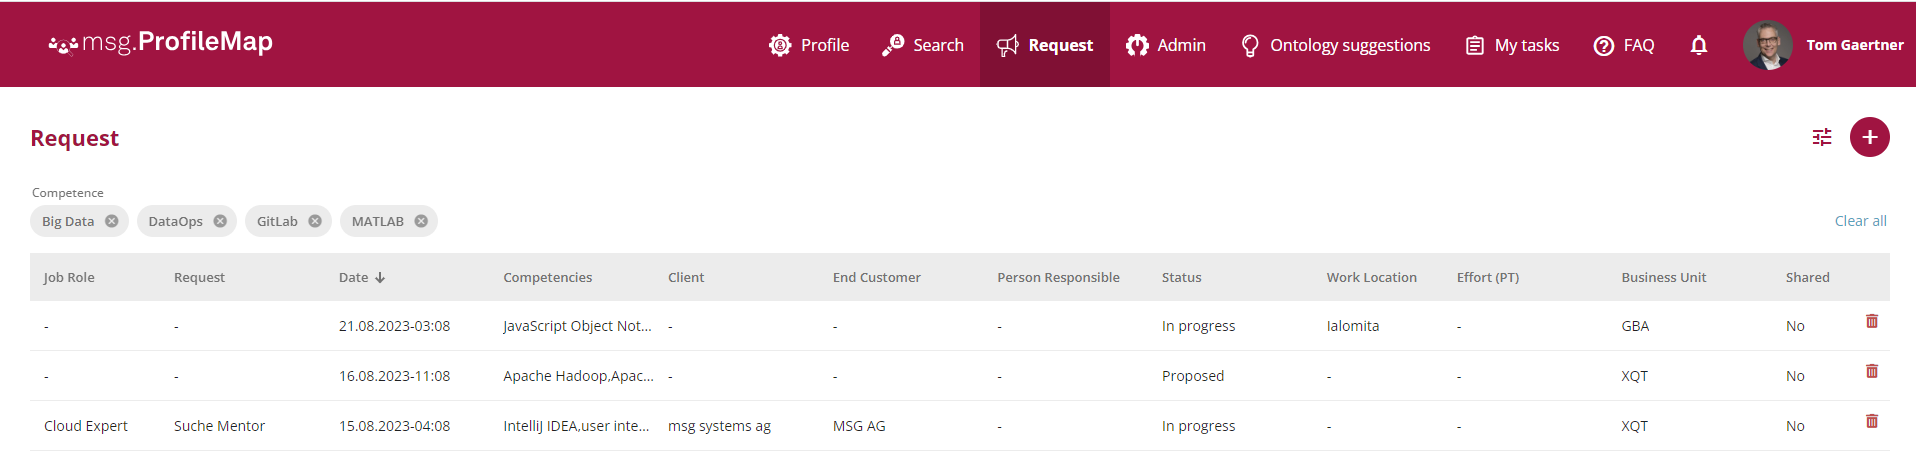
3.4 New Filter functionality in Summary Table
Enhanced Filtering: You can now apply filters across all entered search and request criteria, helping you find the information you need quickly and efficiently.

Filter criteria will be displayed as tokens on top of the result page indicating the values by which the individual requests were selected.
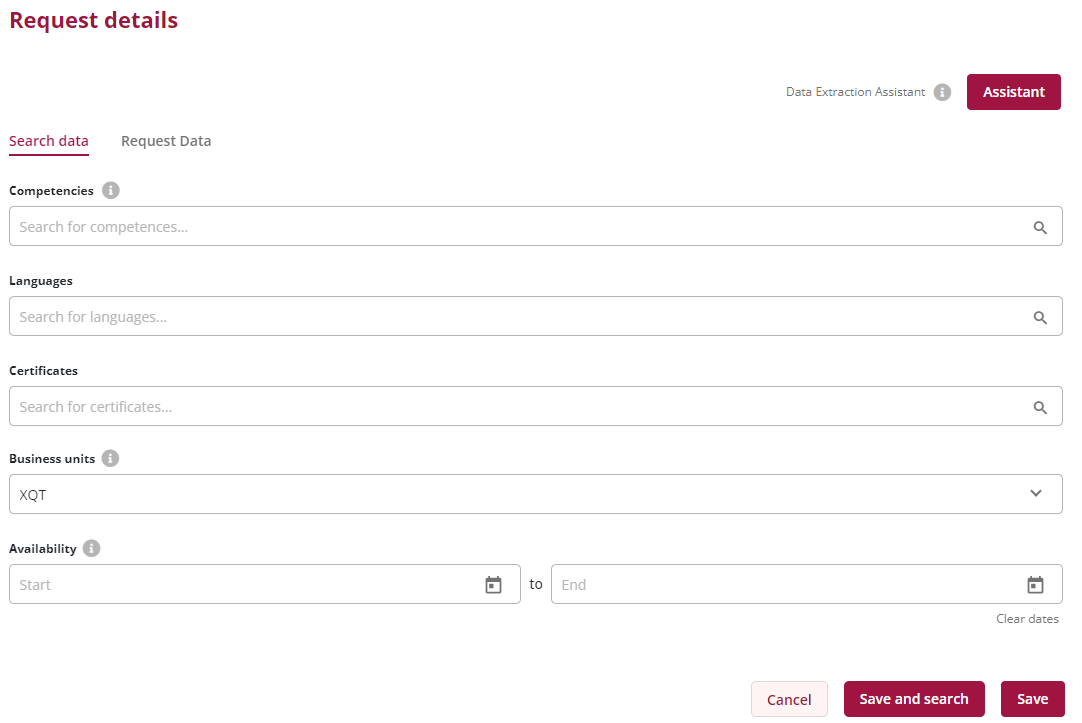
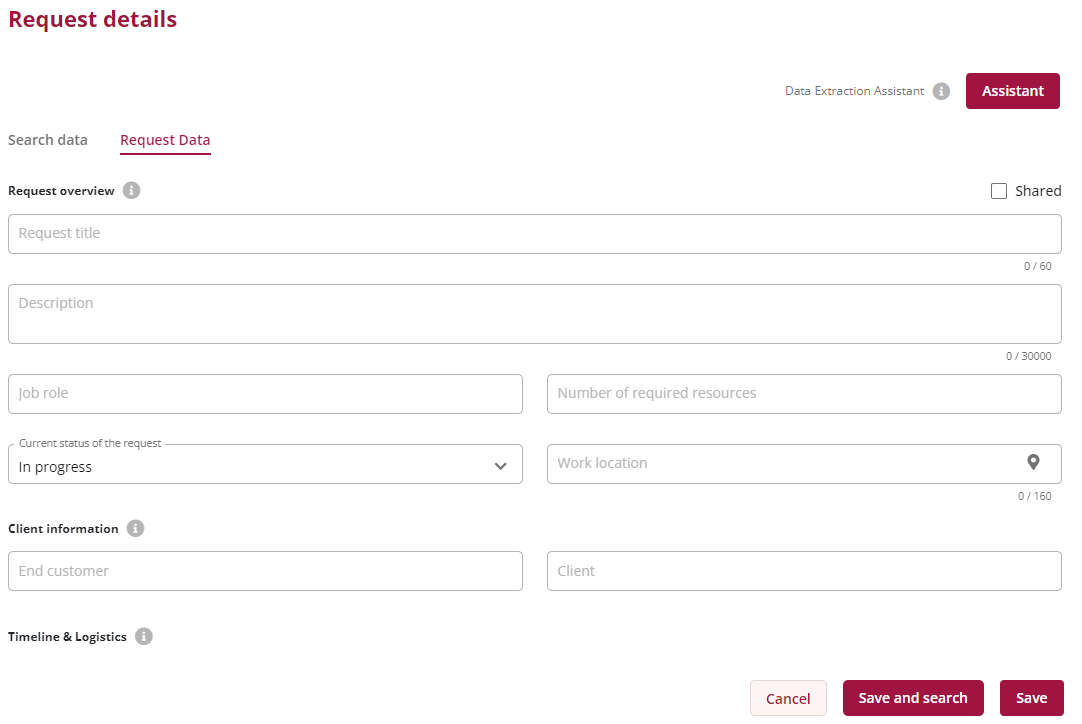
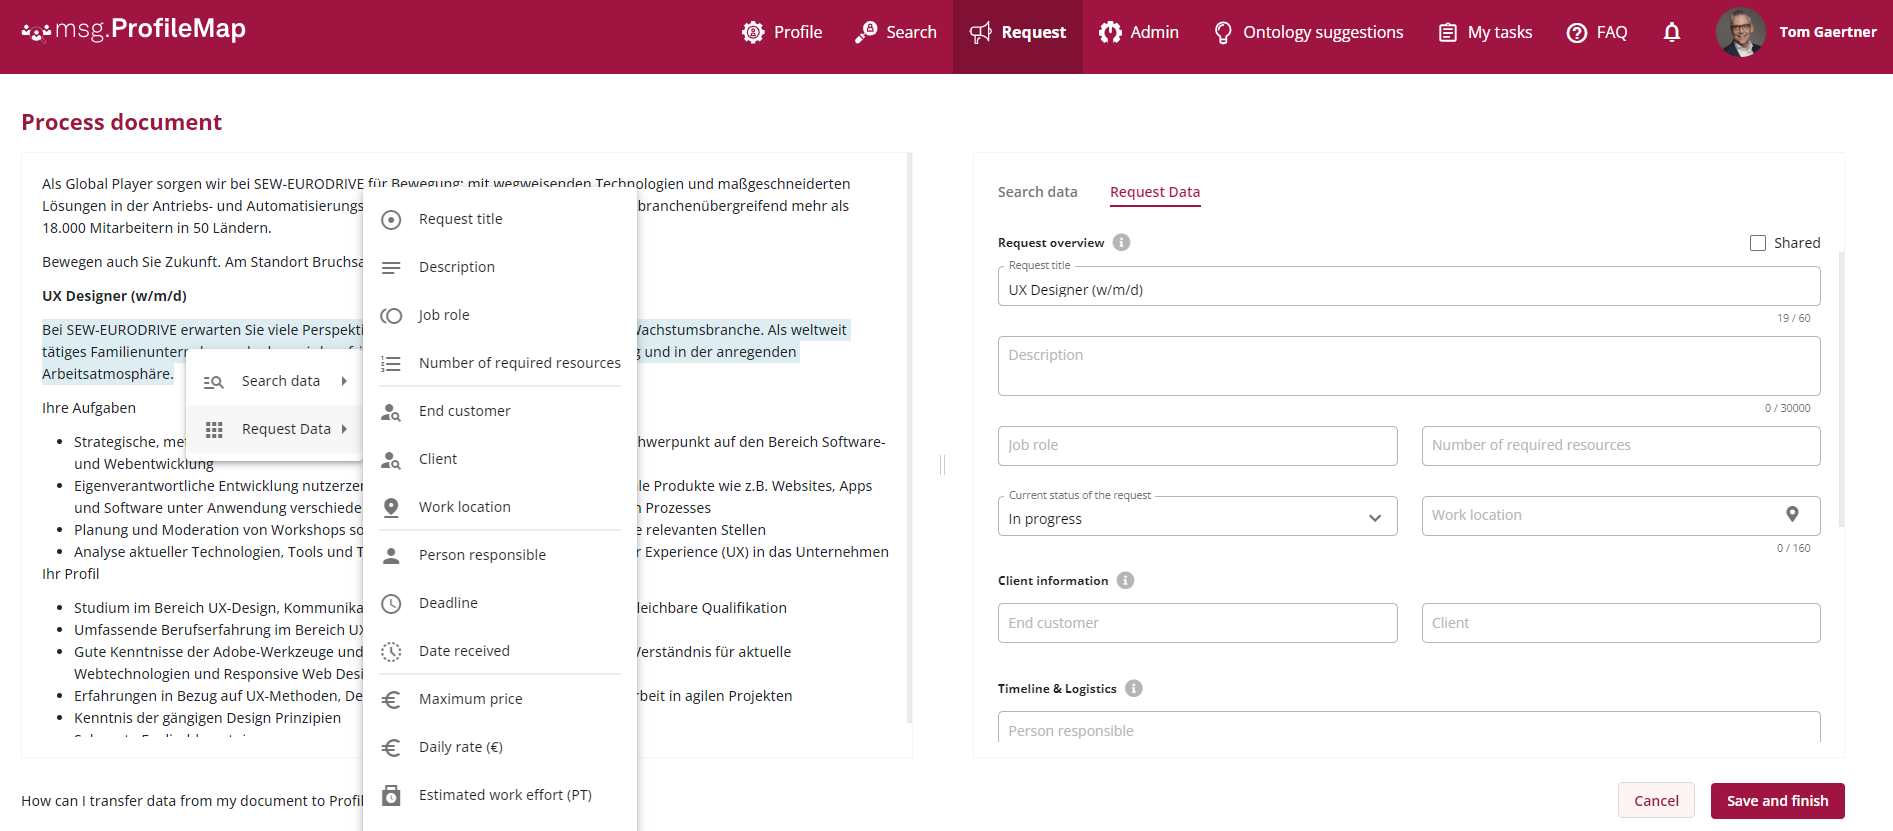
3.5 Creating new Staffing Request – New Window
Introducing a fresh dialogue that enables you to input search criteria and request data simultaneously.
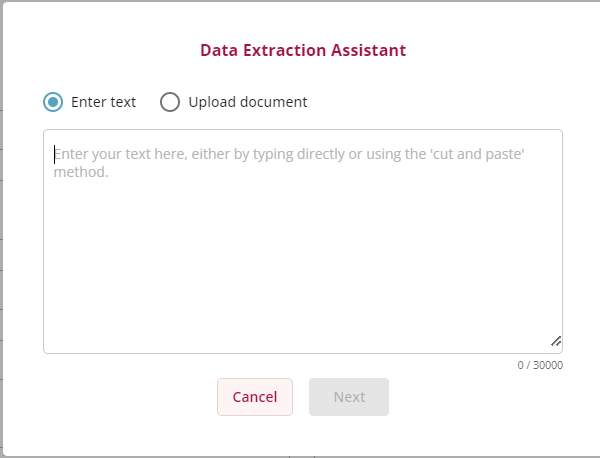
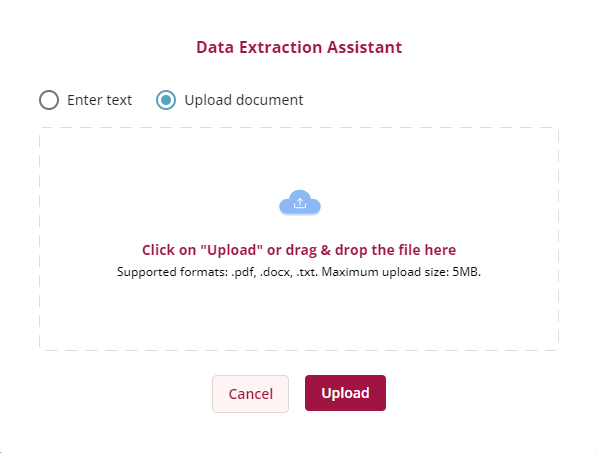
3.6 Data Extraction Assistant
Streamlined Document Processing: The Data Extraction Assistant now offers improved document and text processing capabilities.
Easy Text Transfer: You can now drag & drop or right-click to transfer text or document-based information seamlessly into the search & request information fields.
Original Document Display: You can view the original document to be processed, such as CVs or job postings.
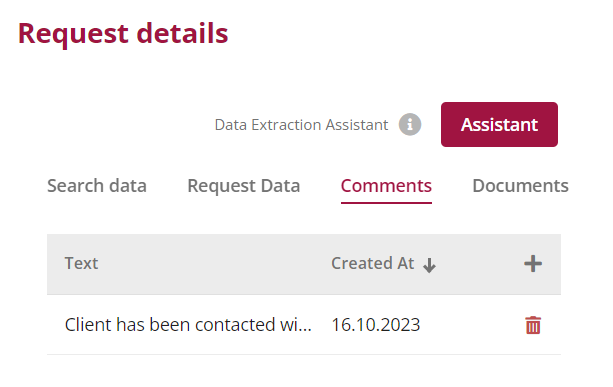
3.7 Comment section is separate tab.
Dedicated Tab: The comment section is now housed in a separate tab, providing better organization and easy access.
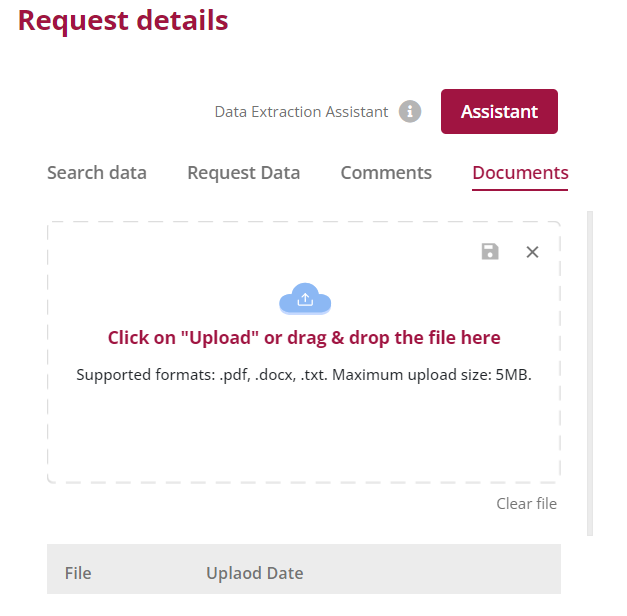
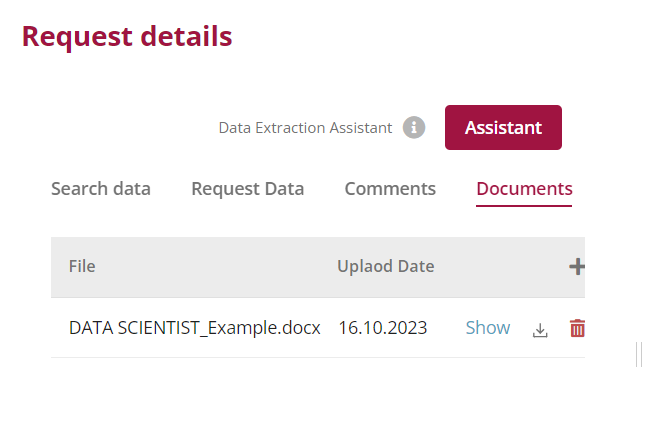
3.8 Document upload against request
Efficient Document Management: You can now upload documents directly against your request, making it more convenient to associate relevant files with your staffing requests.
3.9 Staffing Request Search
Efficient Document Management: You can now upload documents directly against your request, making it more convenient to associate relevant files with your staffing requests.

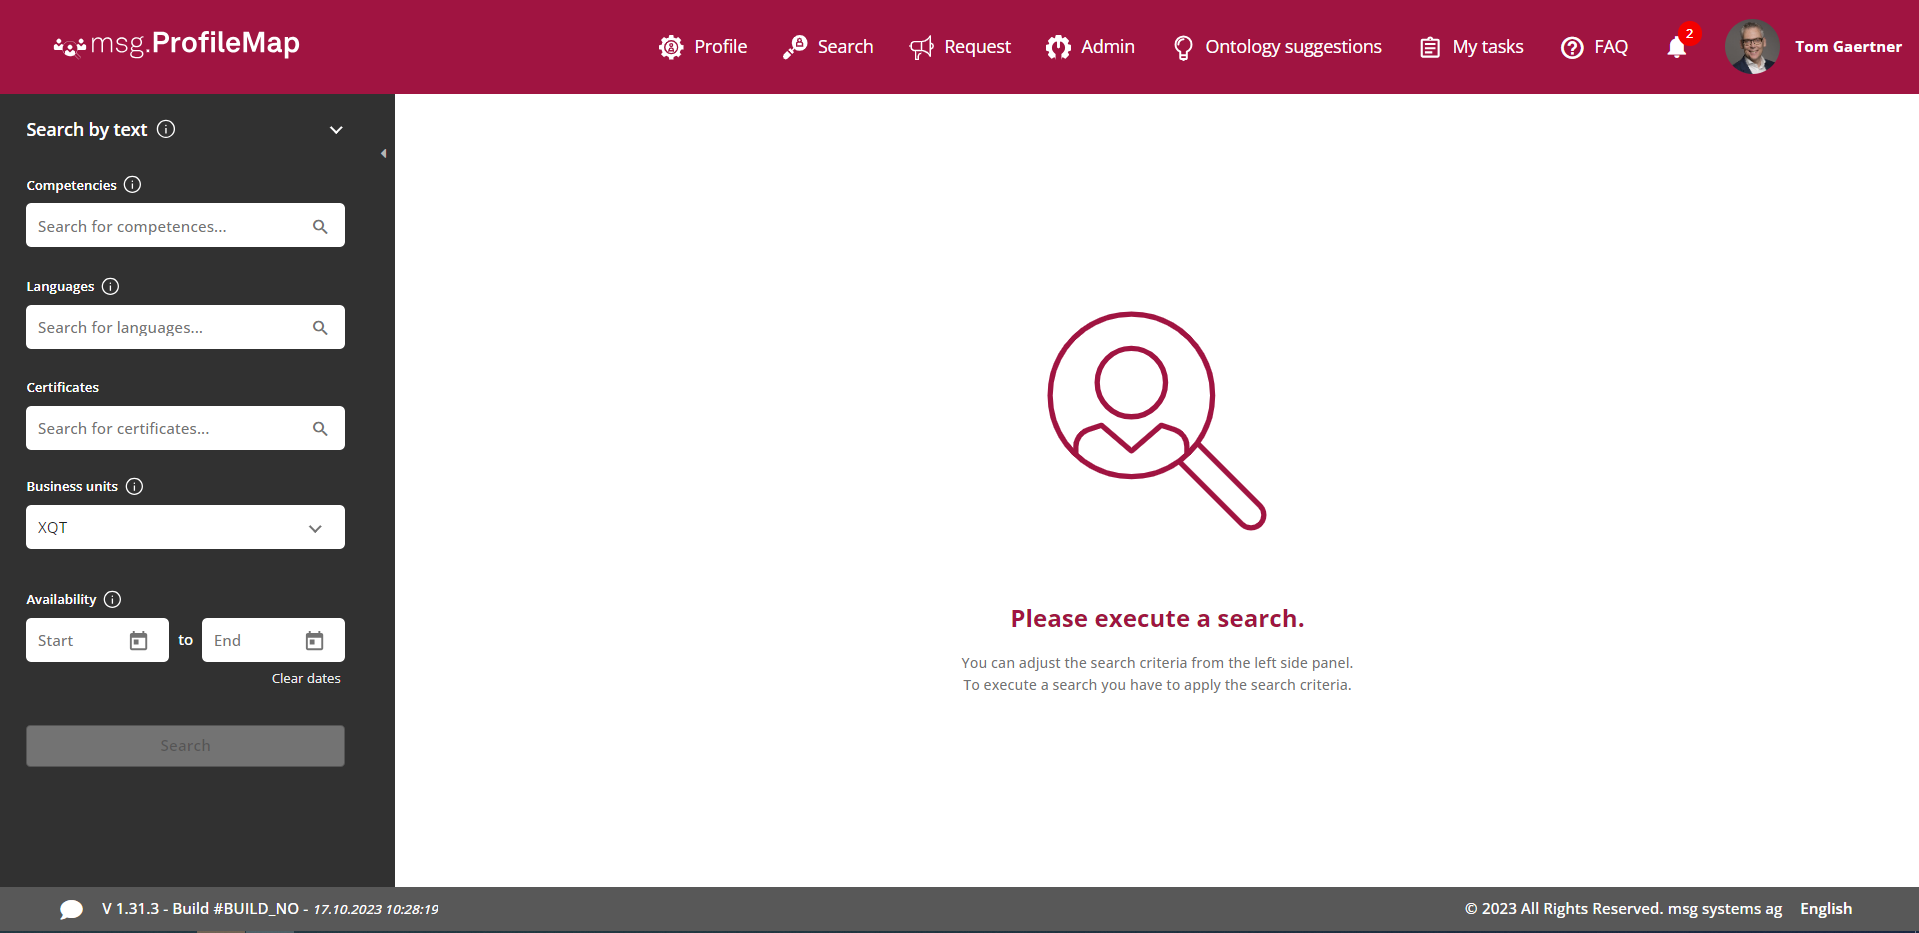
3.10 Changes to the Search functionality
Search Functionality without saving: You will now have the option to perform searches without the need or ability to save the search or its results. This is especially useful when you want to quickly find information without creating a formal staffing request.
What Stays the Same:
– No search history: As before, there is no search history, so the search interface remains clean and uncluttered.
– Search for text: As before, the option to extract text or files exists.
What’s changing:
– Design adapted to requests
– Possibility to generate a request from talent searches
4. Workflow to allow access to anonymized profiles
We are introducing a new feature that allows you to request access to anonymized profiles in msg.ProfileMap. This feature is designed to help you quickly access more detailed profile information when needed.
The feature for requesting access to anonymized profiles is important because it strikes a balance between privacy and information accessibility. It allows users to access more detailed profile information when necessary while maintaining data privacy and compliance with regulations. This capability facilitates efficient decision-making, collaboration, and responsiveness to client/prospect requests, ultimately enhancing productivity and effectiveness in the organization.
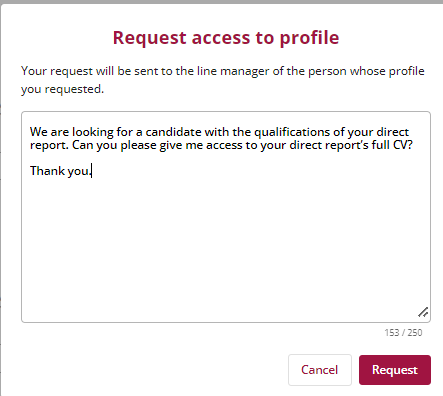
4.1 Request access to profile
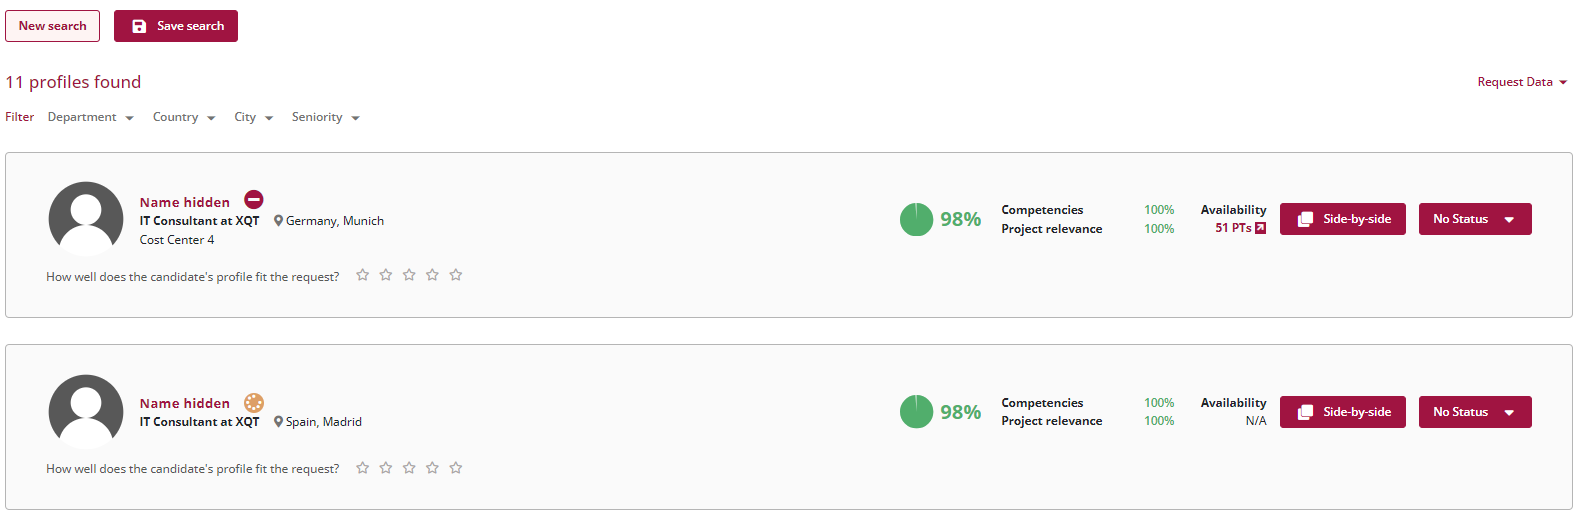
In cases where the profile is anonymized, as determined by your role restrictions, you can initiate a request by clicking on the hidden name.

- This action triggers a workflow that requests unrestricted access.
- Notifications are sent to your line manager and the candidate involved.
4.2 Access Requests Task List
- Access the requests you’ve sent via the „Outbound“ tab.
- Monitor incoming requests under „Inbound Requests,“ making it easy to review and take the appropriate actions.
- The request sent is accessible via a task list from the tab “Outbound” request.

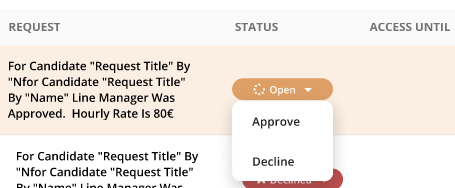
4.3 Inbound Requests (Requests Received):
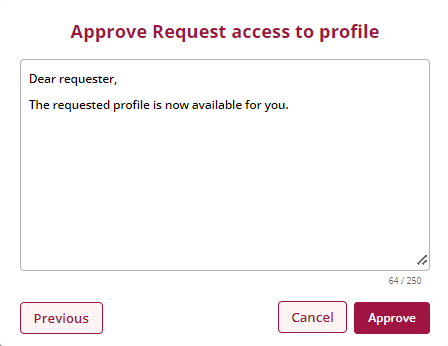
- When you choose to „Approve“ an incoming request, a dialogue with a calendar function appears.
- As the approver (typically the line manager), you can set the duration for which access to the requested profile is granted.
- A corresponding task list for line managers processing inbound requests is accessible.
- From there, line managers can either approve or decline a request.
- Approving a request triggers a dialogue with a calendar function to set the access duration.
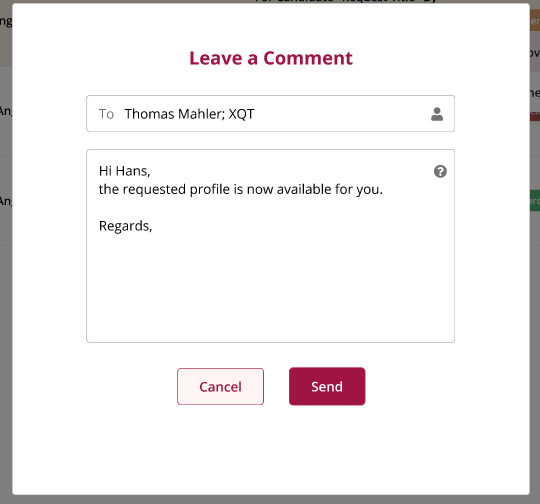
- You can also leave comments for the requestor within this dialogue.

4.4 Edit inbound request
- A corresponding task list for line managers processing inbound requests is accessible.
- From there the line manager can approve or decline a request Upon setting “Approve” a dialogue with a calendar function appears.
- The approver (line manager) sets a date until which access for the requested profile is granted.
4.5 Approving a request
- Approving a request triggers a dialogue with a calendar function to set the access duration.
Upon setting “Approve” a dialogue with a calendar function appears. The approver (line manager) sets a date until which access for the requested profile is granted.
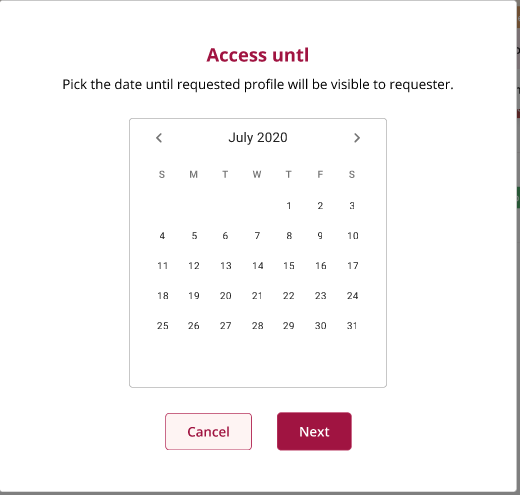
Selecting “Next” will open a dialogue in which the line manager can leave a comment to the requestor.
4.6 Profile Visibility Changes
- Once a request is approved, candidate data in the search results for the requested person is no longer hidden.
Candidate data in the search result for the requested person is no longer hidden.

- The candidate’s status in the query results appears next to their name:
- Approved
- Being Processed
- Declined
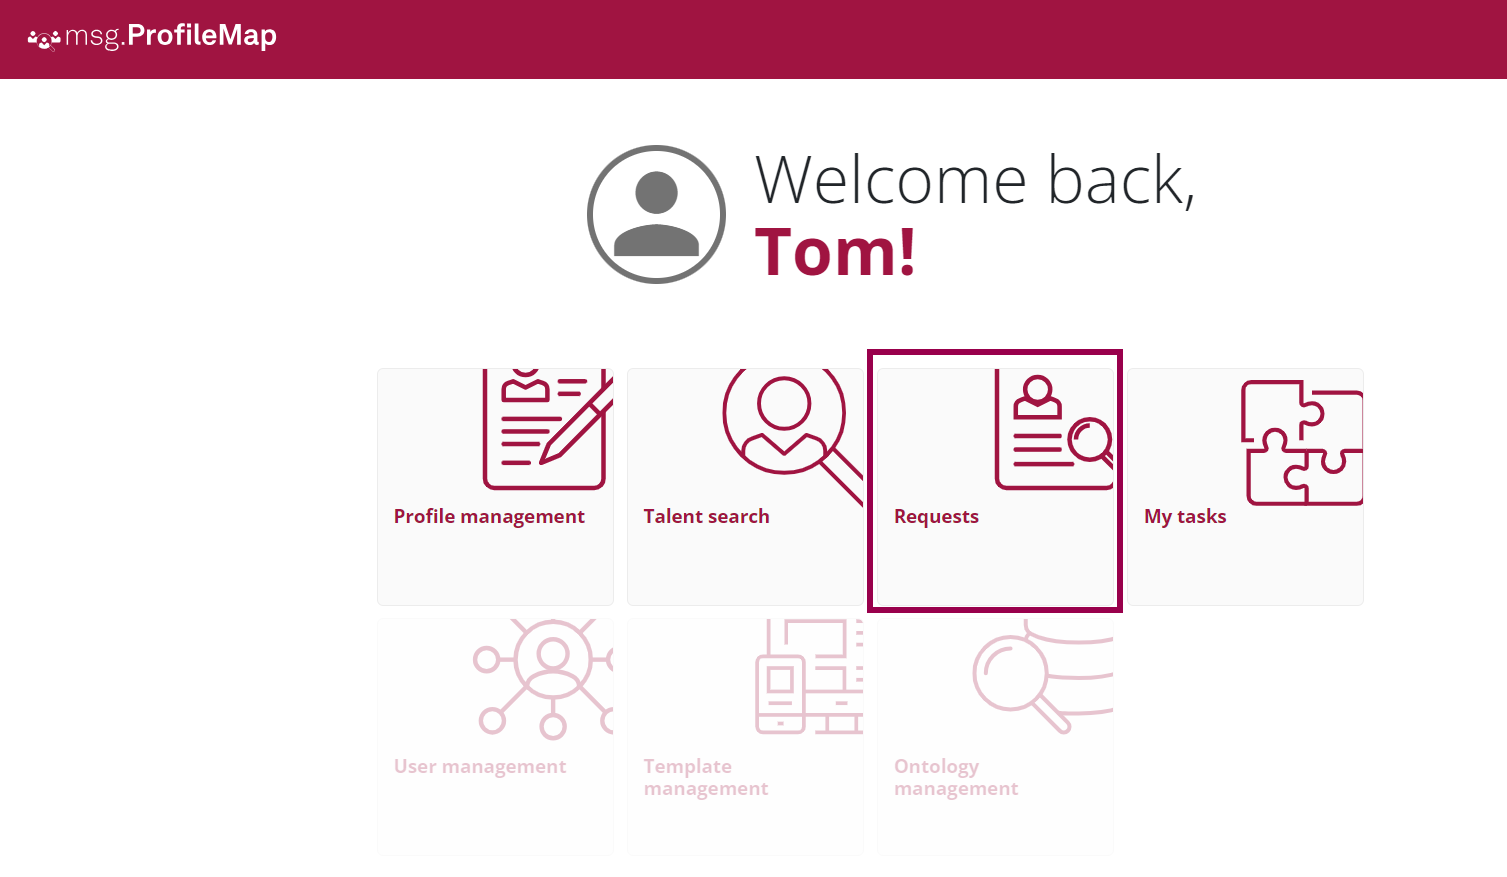
4.7 Access Your Task List
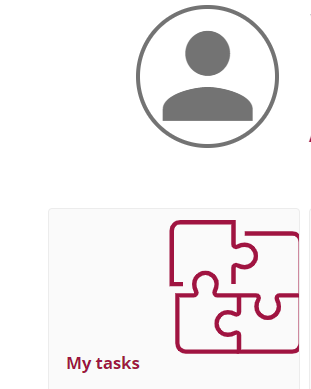
- Find your task list easily from the landing page, represented by the „My Tasks“ tile.
- Clicking on this tile takes you to your list of both inbound and outbound requests.
- The task list can be accessed from the landing page. A new tile “My tasks” appears. Clicking on the tile will take the user to his or her list of inbound and outbound requests.
Outbound requests

Inbound Requests

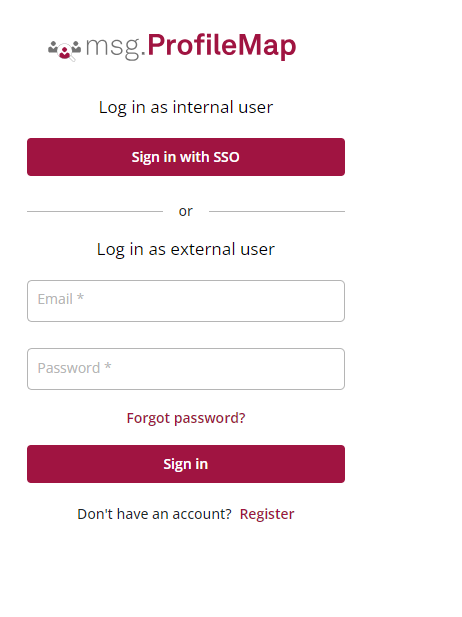
5. Login without SSO
5.1 New login page
- Users may only use the login method with which they originally registered:
- If users registered with SSO, they could only log in via SSO.
- If they registered via ProfileMap, they could only log in via ProfileMap.
- If you have registered as an external user via ProfileMap, you can log in via SSO (only with an internal e-mail address)
- Changing the login method requires support from the Service Desk.
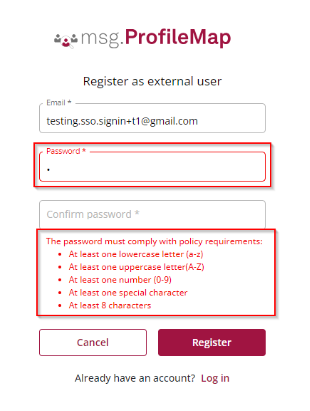
5.2 Registration via Upload
- External users need to be added to the system in advance. The user master data has been uploaded for the external user.
- As a user without a registered account, „Register“ must be selected on the login screen.
- Clicking on the „Register“ button takes you to the registration page.
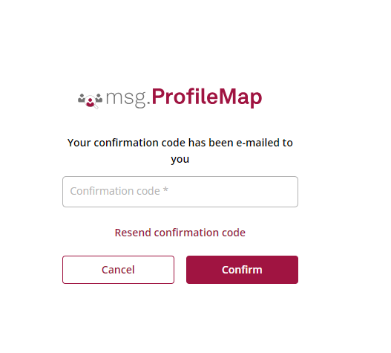
- The e-mail address must be entered. Create a password that complies with the guidelines:
o Length: At least 8 characters.
o Complexity: A combination of:
o Capital letters (A-Z)
o Lower case letters (a-z)
o Numbers (0-9)
o Special characters (e.g. !, @, #, $, %, ^, &)
- A registration code is generated and sent by e-mail. The code from the e-mail must be entered on the registration page. The password must be entered again for confirmation. If the code is correct, you will be redirected to the login page. The login data is used to log in and access the dashboard or the start page is granted.