| Inhalte | |
| Login Profile management Talent search Requests | Tutorial |
| My tasks User management Template management Ontology management | User Manual (DE) |
In the whole document the terms “skills” and “competencies” are used as synonyms. Both terms are used throughout the whole documents and the meaning is identical.
Login
To log in to the system, one needs to navigate to www.profilemap.de and type in the Active Directory credentials. The user is prompted to use either the Azure Multi-Factor Authentication or the SecurID Authentication Method, otherwise the user is taken directly to the dashboard screen if connected through the msg VPN.
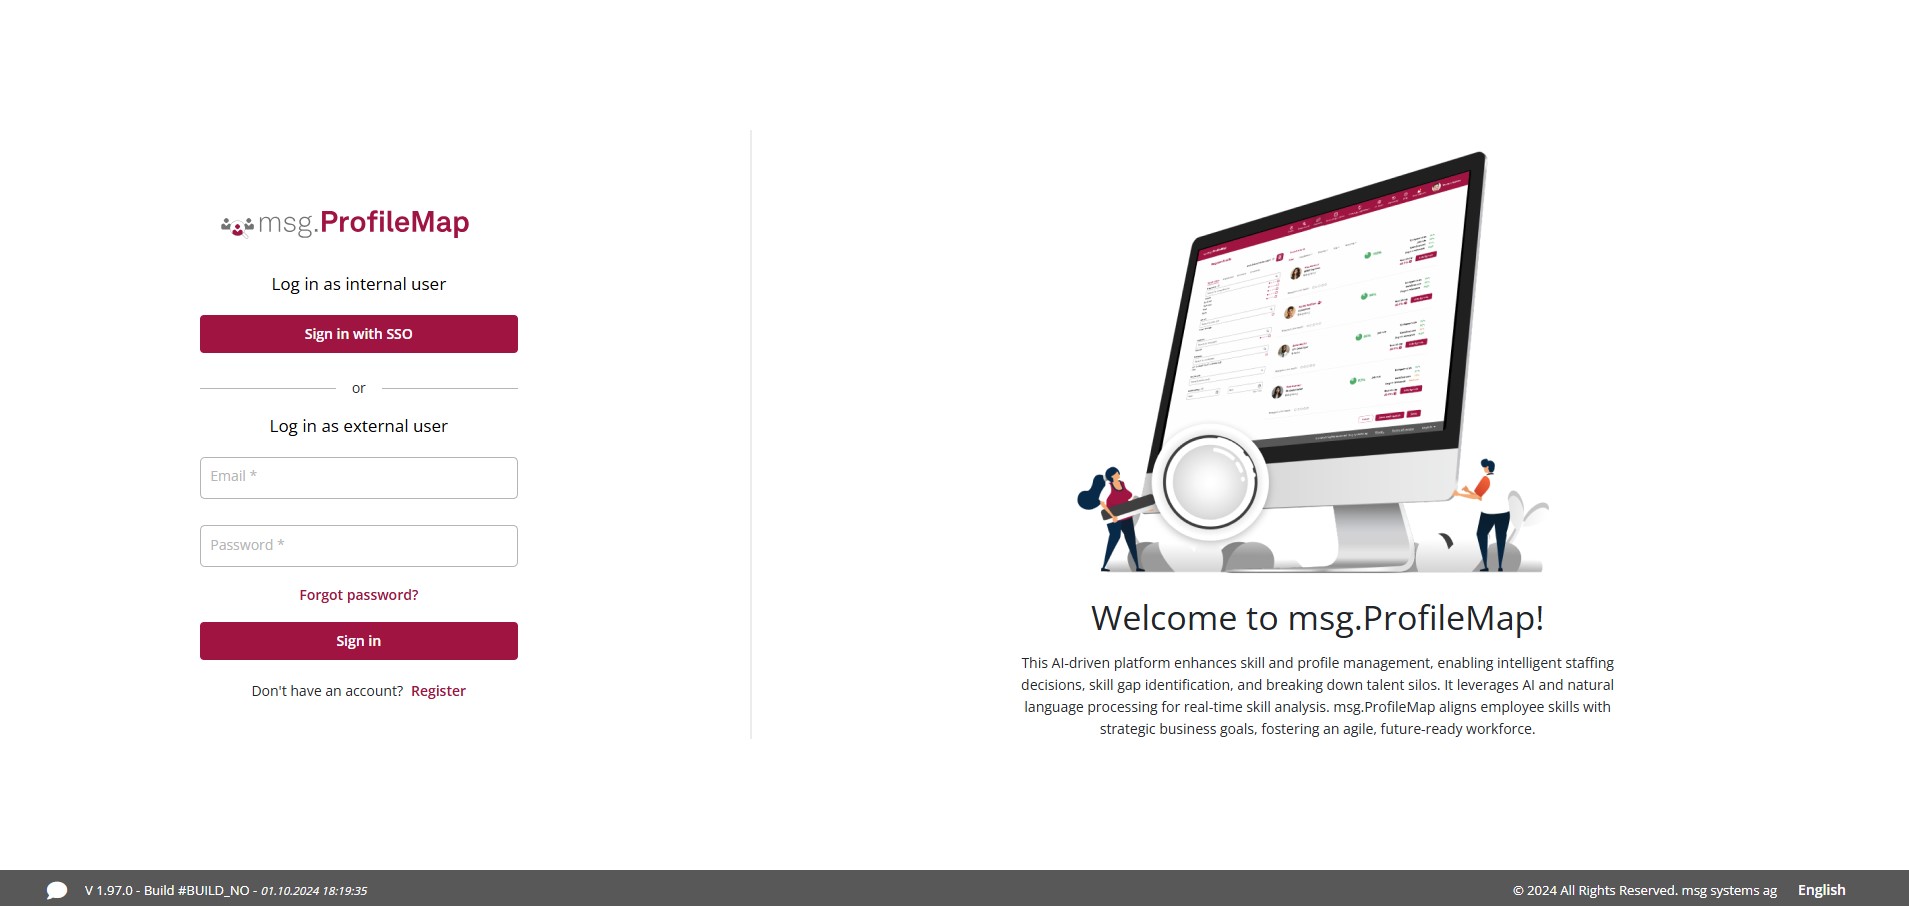
Figure 1: Login Screen
Login User without SSO
Precondition:
Userupload with User Master Data -> HelpDesk Team gets in touch with the user or contact person, when userupload is done.
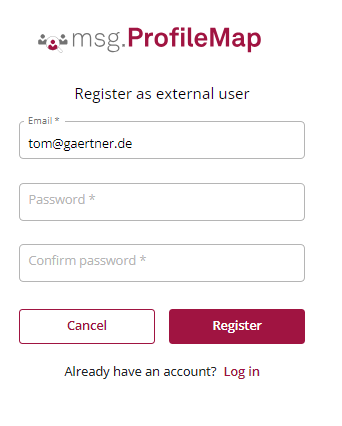
Registration for new User:
1.) Click „Register“
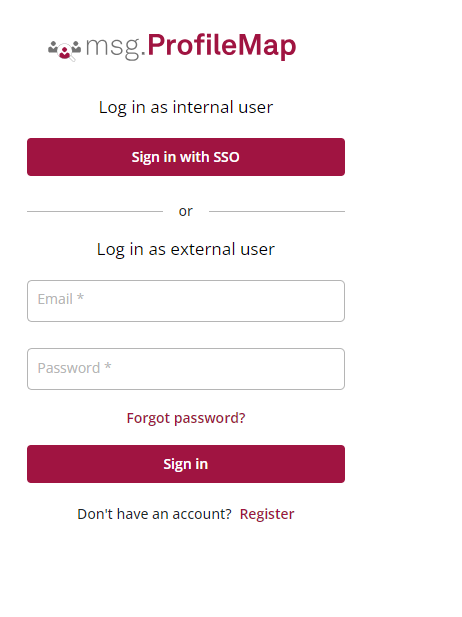
2.) Enter Login Data (Mailaddress which is verified with the mailaddress set in userupload) and enter new password and click „Register“
3.) Message is shown that the user is inactive – click „Activate“
- Email is sent to own email address with verification code
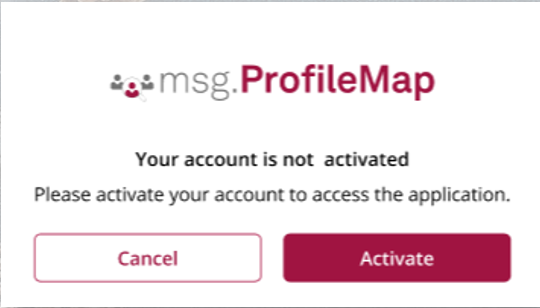
4.) Enter verification code from email and click „Confirm“
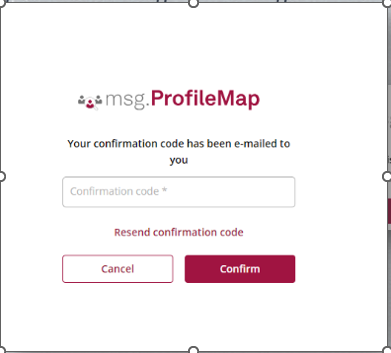
5.) „Login as external user“ via Email & Password to msg.ProfileMap
In case of problems please contact msg.ProfileMap.HelpDesk@msg.group
Document Overview
General Terms and Copyright
© msg systems ag, 2024
Version History
| Version | Description | Author | Date |
|---|---|---|---|
| 1.0 | Initial Creation | Eva Forster | 16.09.2020 |
| 2.0 | Uptate for UAT | Adrian Mandra | 04.03.2021 |
| 3.0 | Including Data Curation and Data Categorization | Susanne Maier | Nov / Dec 2021 |
| 3.0 | Adjustments for Data Curation: Editing existing terms (skills, certificates, clients)
Edit Skills: Skilllevel |
Susanne Maier
Monique Strehlow |
May 2022
July 2022 |
| 3.1 | Asynchronous search calls and subscores | Philipp Blohm | Feb 2023 |
| 3.2 | Update whole User Manual | Susanne Maier/ Monique Strehlow | Dec 2024 |
Change History
| Version | Chapter | Description | Author | Date |
|---|---|---|---|---|
| 3.0 | Data Curation | Adding new feature „Deactivating Terms in Ontology” | Susanne Maier | August 2022 |
| 3.0 | Remove Skill Search | Skill Search needs to be removed from User Manual | Georg Jülke | September 2022 |
| 3.1 | Edit Projects and Focus Area | Competencies in Projects and Focus Area can be changed without loosing already set competencies | Susanne Maier | Feb 2023 |
| 3.2 | User Manual | Update whole User Manual | Susanne Maier/ Monique Strehlow | Dec 2024 |
Reference Documents
| Ref. | Document | Version | Date |
|---|---|---|---|