Data Categorization
Data Categorization is only available for terms already added to the ontology. A Skill Manager always manages the categories of their own BSU and can pick and categorize any skill from the ontology.
If necessary, the Skill Manager can suggest new skills.
Changes regarding categories and content of the categories are only visible for their own BSU and won’t have any impact on other BSUs.
The Data Categorization can be selected on the dashboard with click on “Ontology management”. In Ontology management click on “Data Categorization”.
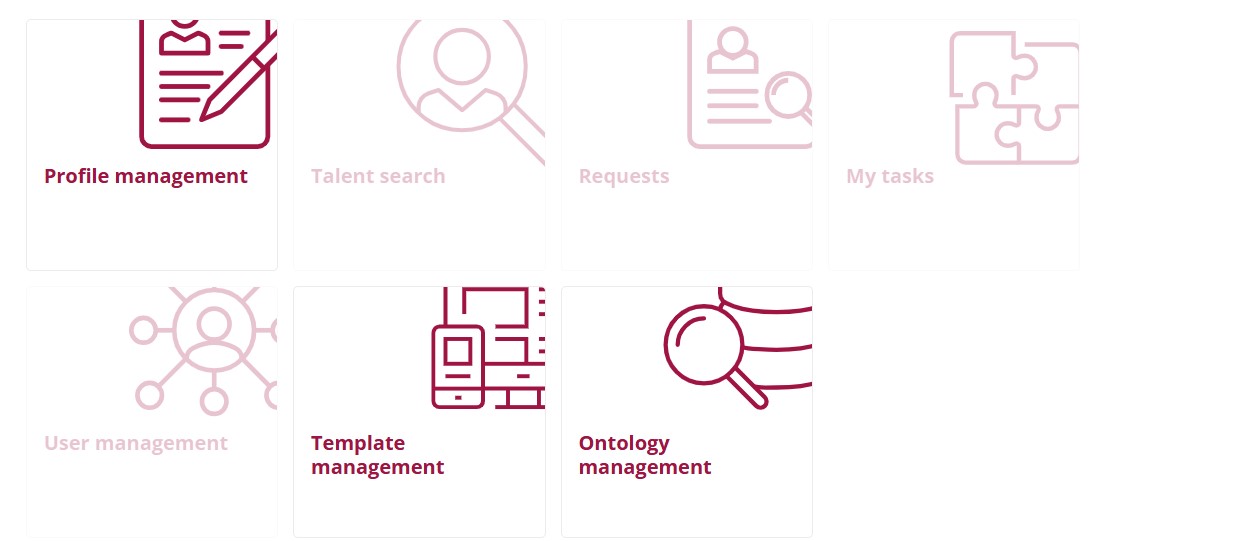
Figure 1: Select Ontology management

Figure 2: Select Data Categorization
Add / Change / Delete Category / Subcategory
To add a new category or subcategory click on “Add a new category”. It’s possible to create several levels of categories.
To create a new category a German and an English name need to be assigned. After entering the name click “Done”.
Duplicate names are not possible.
To edit the names of a category or delete a category hover over the category and an edit button (form of a pencil) and a delete button (form of a trash can) will show.
For editing the names click on the pencil. To delete a category including the skills and subcategories assigned to this category click on the trash can.
The assigned skills are only deleted from the category, not from the ontology. Skills can be reassigned again to a different category.
Hint: The top level categories can be referenced in the profile export templates. For more details check the documentation for creating templates.

Figure 3: Add new category
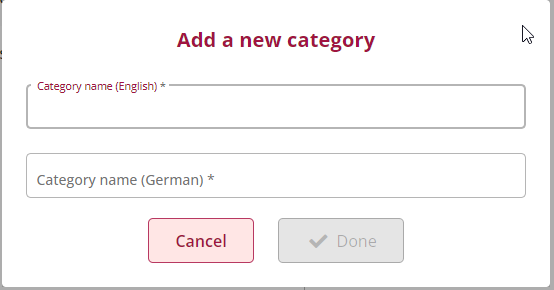
Figure 4: Enter / change names for category

Figure 5: Edit and Delete buttons for a category

Figure 6: prompt before deleting a category
Add Terms to a Category or Subcategory
After creating a category skills can be added to it.
With click on “Import competence from ontology” a window opens where a skill can be searched and selected with click on “add”. After the necessary skills are selected click “Done” and the skills will be added to the category.

Figure 7: start adding new skill to category
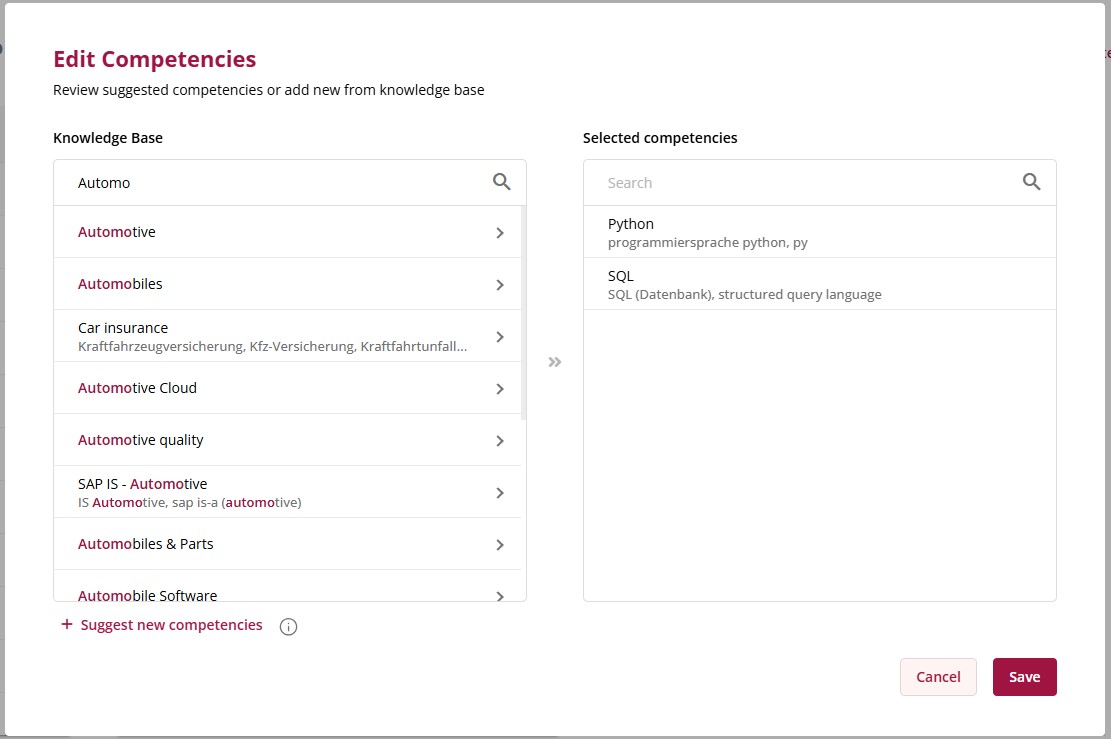
Figure 8: selecting skill for category

Figure 9: New skill added to category
Suggest new Skills
If the necessary skill is not available in the ontology the Skill Manager can suggest new skills for the Data Curator to add to the ontology.
For this click the button “Suggest a new competence” in the screen for adding skills to the category. In the new window the name of the new skill can be adjusted if necessary. With click on “Suggest” the new term will be sent to the Data Curator who will check and add the new term to the ontology
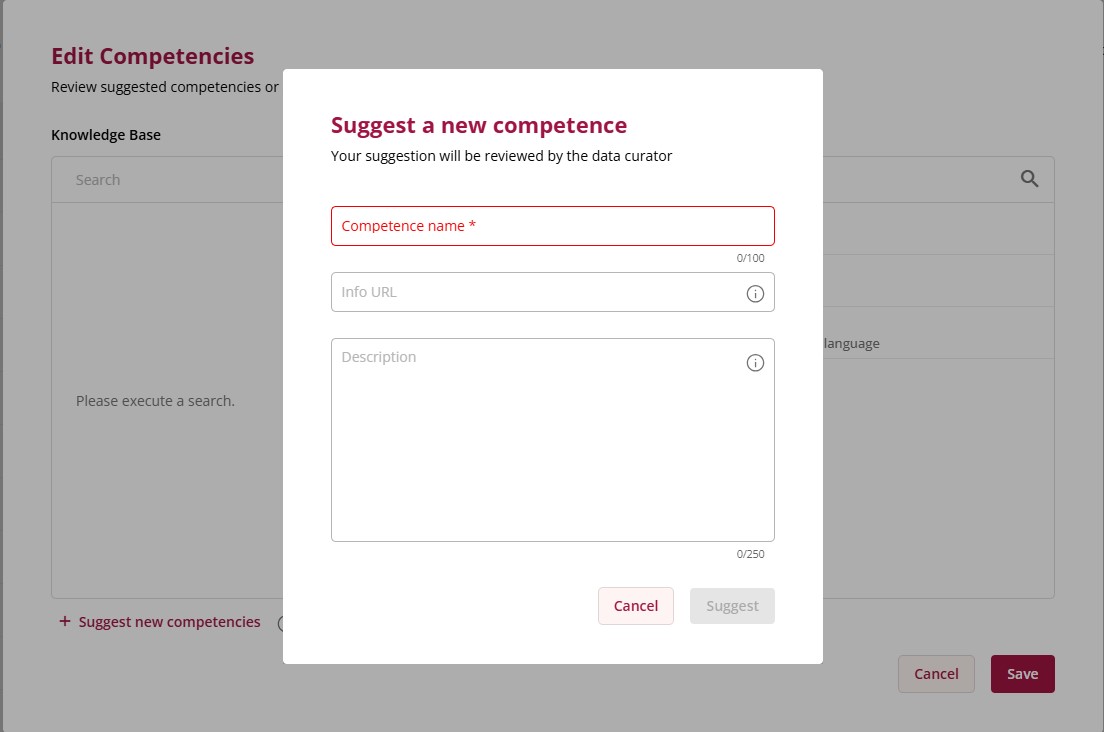
Figure 10: Suggest new skill
Delete Terms from a Category or Subcategory
Skills can be deleted from a category.
While hovering over the skill a delete button in form of a trash bin appears. A click on the trash bin deletes the skill from the category.

Figure 11: Delete skill from category
Data Curation
In Data Curation the role Data Curator can suggest and add new terms to the ontology. To access Data Curation click on “Ontology management” and “Data Curation”.
Figure 12: Select Ontology Management

Figure 13: Select Data Curation
Suggesting new Terms
New skills, customers and certificates can be suggested in different parts of the application:
- Profile Management – for details check the following chapters:
- Suggest new Skills
- Suggest new certificate
- Add Projects
- Data Categorization
- Data Curation
Viewing own suggested Terms
To be able to keep track your own suggested terms there is a new list.
In can be accessed through the menu at the top of the screen with click on “Ontology suggestion”.

A table is shown with the terms which were suggested by the logged in user.
By clicking on a different tab the lists can be changed between skills, certificates and clients.
By click on the arrow at the beginning of the line the details for the suggestion can be viewed. If changes are necessary they can be entered by clicking on the pencil at the end of the line.
By clicking on the cross the suggestion can be deleted.

Figure 14: Suggested Skills

Figure15: Suggested Certificates
Directly after suggesting a new term the status is set to “Pending”. This means that the Data Curator didn’t work on it yet.
When the Data Curator added the new term the status changes to “Approved”.
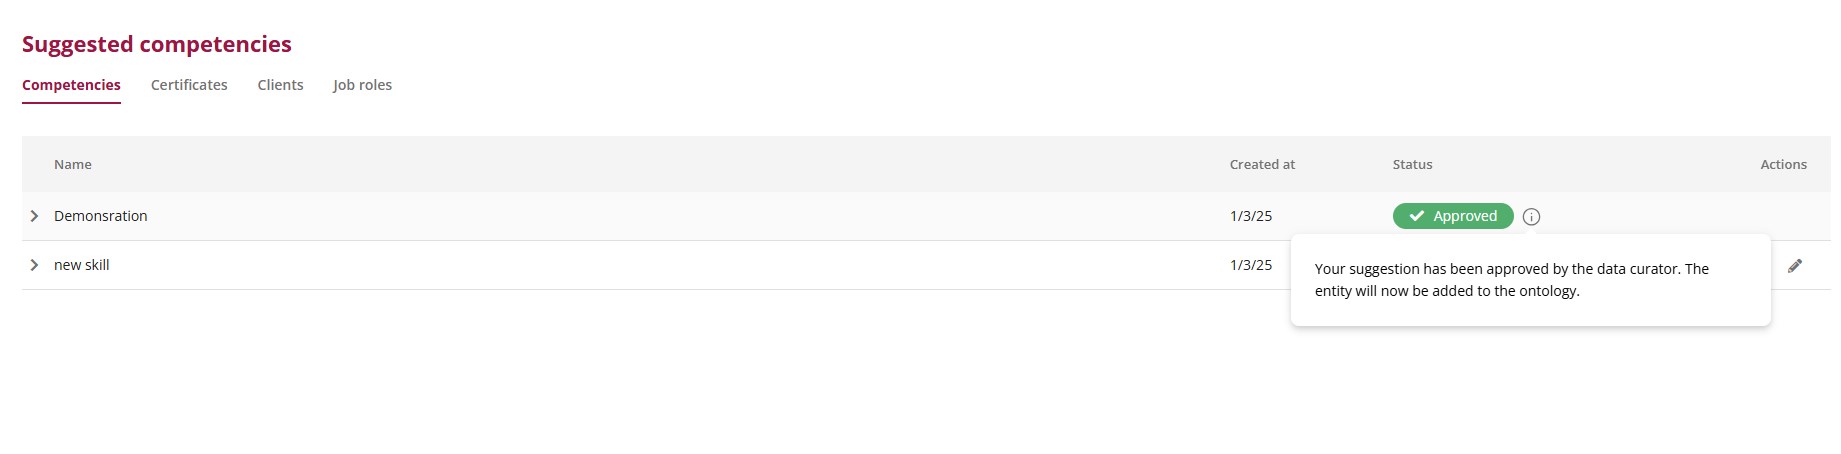
Figure 16: Approved Term
If a term is rejected the status “Rejected” is displayed. The reason why the term wasn’t added is shown in a tooltip when moving the mouse over the “?”-Symbol next to the status.
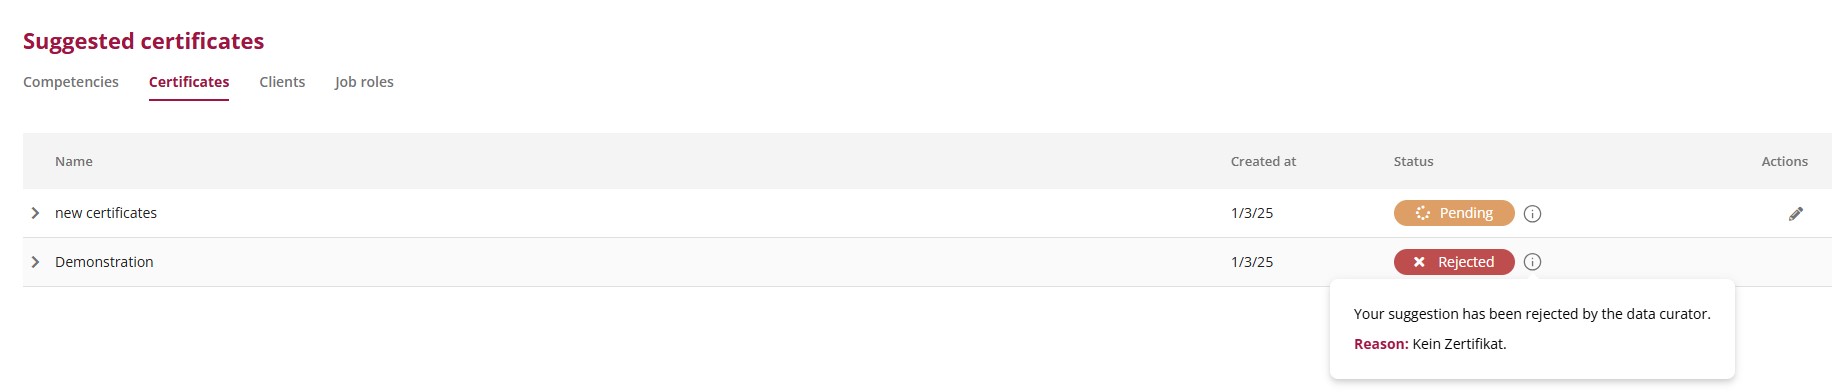
Figure 17: Rejected Term
If it’s not deleted by the Data Curator or the user themselves, it’s removed automatically after a few weeks.
New Skills

Figure 18: Header for Data Curation
Search and Suggest new Skills
The Data Curator can search in the list of suggestions. The search string can be entered in the search field.
If the Data Curator needs to add a new skill click on the button “Add a new skill”. A window opens where the new skill can be added to the ontology. For a more detailed description see chapter „Check / Accept / Reject new Skills“.

Figure 19: Button for adding a new skill
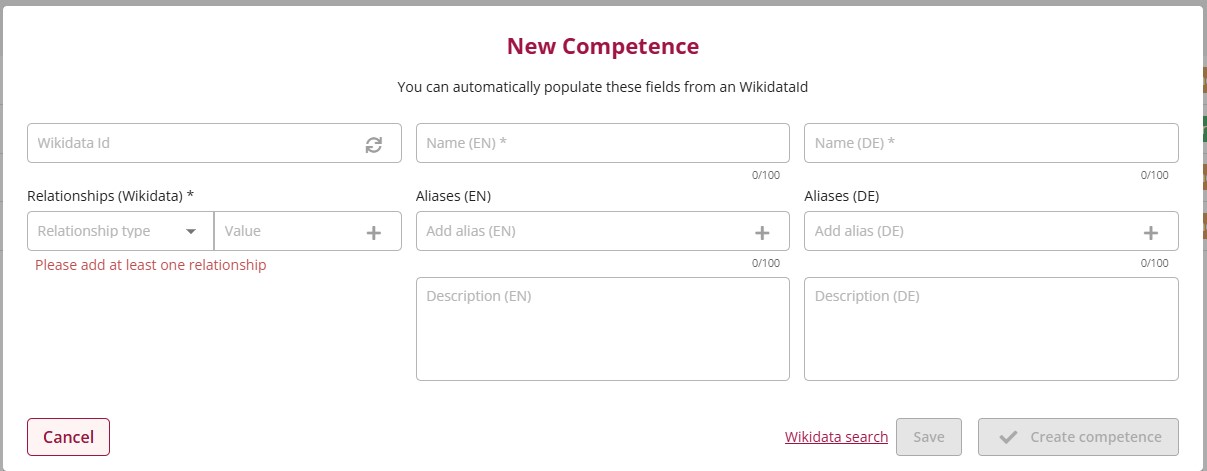
Figure 20: Screen for entering skill data
Check / Accept / Reject new Skills
If new skills are suggested in Profile Management the suggested skills are listed for the Data Curator in Data Curation.
Initially the following data is listed for the skill: English name, name of user who suggested the skill, date of suggestion.
The buttons for editing (pencil) and deleting (trash can) are displayed.

Figure 21: List of newly suggested skills
To check and edit the new skill click on the pencil. The following screen will appear.
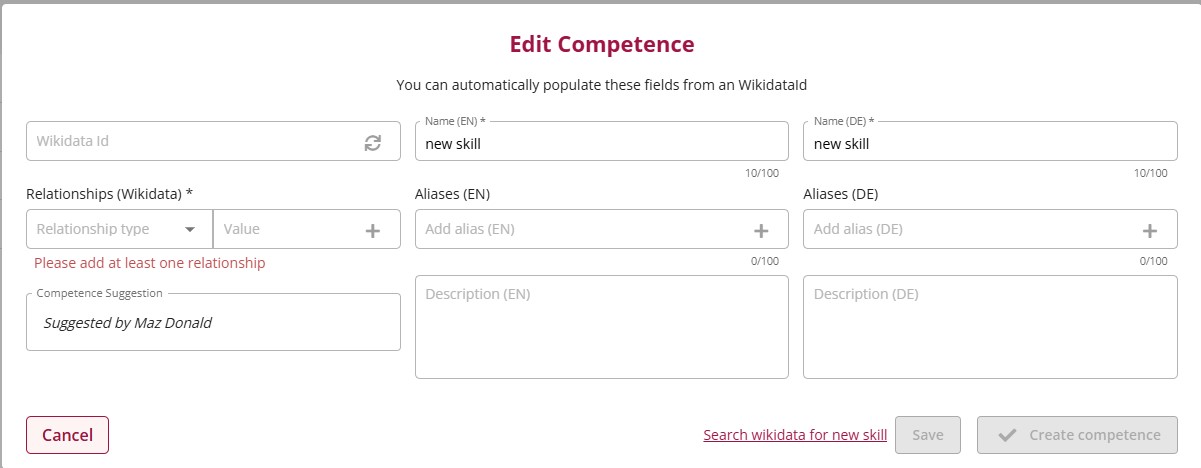
Figure 22: Edit new skill
The basis of the ontology is the website wikidata.org. To search for the new skill, click on the link “Search wikidata for New Term”. A new browser tab opens with the search results for the search term.

Figure 23: New browser tab after click on wikidata-link
After selecting the correct entry in wikidata the wikidata ID needs to be copied and entered in the wikidata ID-field.
With reloading the data (click on refresh arrows in field “wikidata ID”) the data connected to the wikidata ID is added to the window.
Part of the data are aliases in English and German and relationships.
If necessary, the names, aliases and relationships can be adjusted manually. If everything is OK click button “Save and accept”.
If there are open questions the new skill can be saved (button “Save”) without accepting the data. The data is just saved and can be worked on at a later point, for example after clarifying open question with the person who suggested the new skill.
If the term already exists in the ontology a message is shown: “There is already an entry with this wikidata Id”. In this case the skill can’t be added. The button “Save and accept” is inactive and the suggested skill needs to be deleted: click on cancel, then delete the suggested term with click on the trash can.
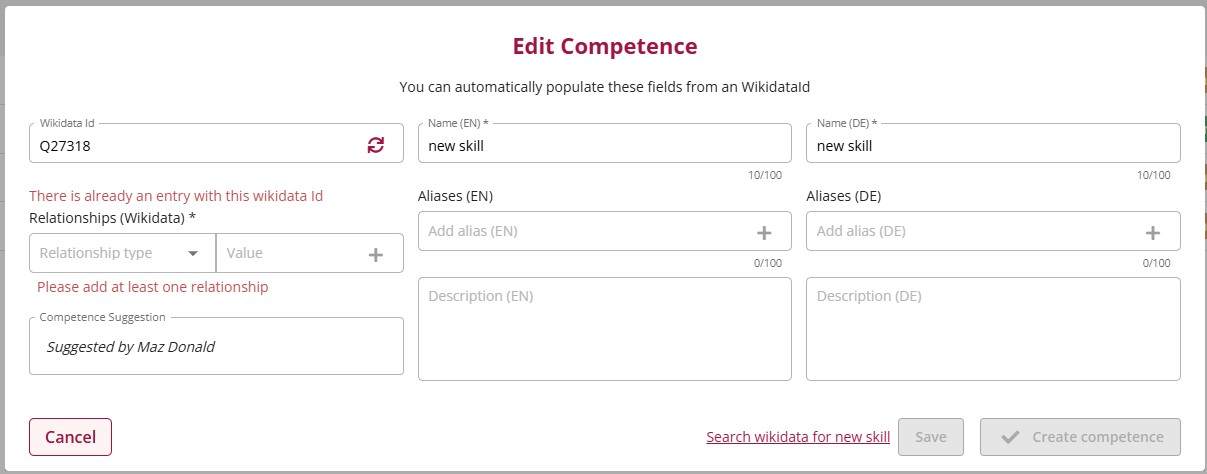
Figure 24: Loading data from wikdata.org – wikidata id already exists/ Existing terms can’t be added.
If a skill needs to be added which has no entry in wikidata.org it can be added without a wikidata Id. The necessary date needs to be added manually:
- English name
- German name
- Aliases in English and / or German (optional)
- At least one Relationship referenced to Wikidata
- Select a type from the list
- Search for skill
- Click plus button
After entering all necessary data click on button “Save and accept”.
The accepted skill is highlighted in green.
It’s possible to undo the acceptance. Edit the new skill again and click on button “Save and undo accept”. The entry is now highlighted in grey.
If a suggested skill needs to be deleted a security prompt appears which needs to be confirmed to finish deleting the skill.
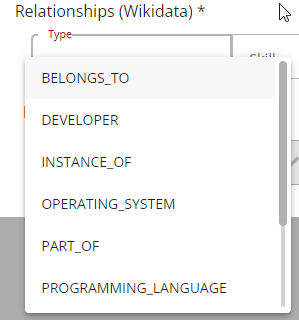
Figure 25: selecting relationship type
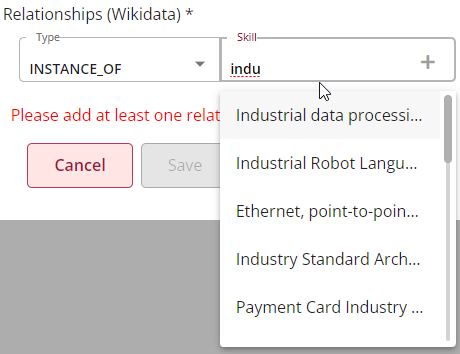
Figure 26: selecting relationshop skill
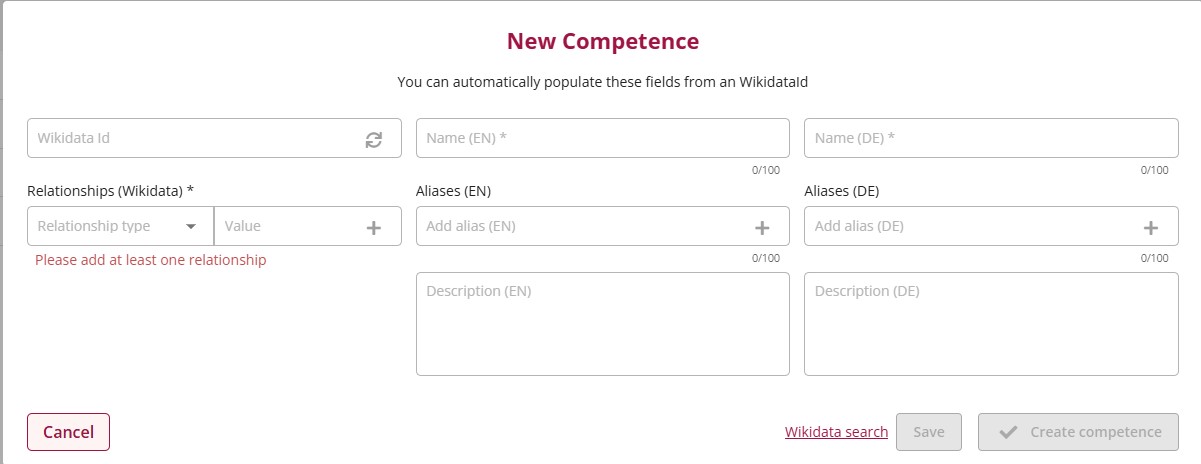
Figure 27: Save and accept new skill

Figure 28: approved skills highlighted in grey
New Certificate
To switch to the newly suggested certificates click on the filter and select “Certificates”.
The list of suggested certificates is displayed.
Any user can suggest new certificates in profile management – see chapter 2.15 Suggest new certificate.
A Data Curator can also add new certificates directly in the Data Curation dialogue with click on “Add a new certificate” and “Create new”.
A new window open where the relevant data for the new certificate can be entered or edited. It’s the identical window which opens when clicking on the edit button of a suggested certificate.
Relevant data for a certificate:
- English name
- German name (can be identical to English name)
- Category, selected from a drop down list
The edit screen can be closed by click on:
- Cancel – changes will be ignored
- Save – data will be saved so it can be edited again at a later point
- Create certificate – suggested certificate will be added to the ontology at once.
The entry will be deleted from the list.
If a suggested certificate needs to be deleted, click on the delete button. The delete request needs to be confirmed.

Figure 29: Select suggested certificates

Figure 30: Suggest new certificate

Figure 31: Edit/accept button for certificate
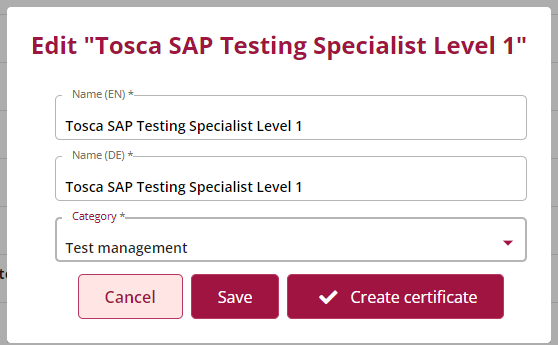
Figure 32: Edit new or suggested certificate

Figure 33: Delete button for certificate
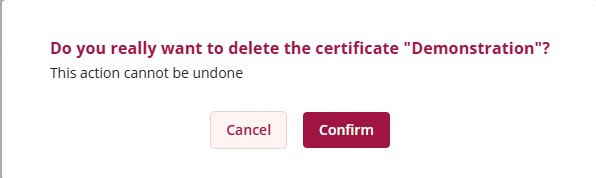
Figure 34: Prompt for confirming deletion of certificate
New Clients
To switch to the suggested clients, click on the filter and select “Clients”.
The newly suggested clients are listed.
Like new skills the English name, “suggested by” and the date of the suggestion are listed. Possible actions are editing (pencil button) and deleting (trash can button) the suggestion.
Any user can suggest new clients in profile management – see chapter 2.18 Add Projects.
The Data Curator can also add new clients in Data Curation with clicking on the button “Add a new client” and “Create new”.
A window opens where the data of a new client can be added:
- Wikidata ID
- English name
- German name (can be identical to English name)
- Category from a drop down list
This is the same window as the edit window when the edit button of a suggested client is clicked.
After entering / editing the client data the data can be saved for a later decision or created directly and is available in profile management at once.
If the client already exists or is a duplicate the suggestion can be deleted with the delete button on form of a trash can.

Figure 35: Switch to clients and list suggestions

Figure 36: Add new client
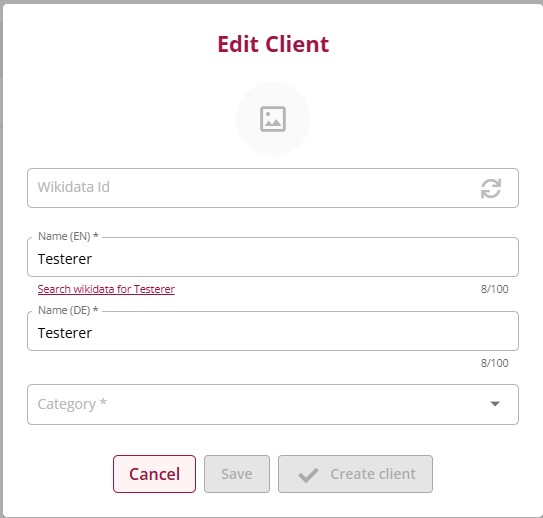
Figure 37: Edit new / suggested client

Figure 38: Delete a suggested client
Editing existing Skills, Certificates, Clients
Existing issues can be adjusted in data curation after adding them.
As with for new terms the filter can be adjusted for selecting for skills, certificates or clients.
Reasons for adjusting terms can be
- Removing typing errors
- Adding or removing relationships for skills
- Adding new aliases
- Adjusting name for other reasons
- Changing categories for customers or certificates
Default setting for Data Curation is “new”.

Figure 39: Display suggested terms
The display can be changed to “Existing”:

Figure 40: Display exising terms
The initial list after changing the view is empty. The list fills as soon as in the search field a search string is entered.
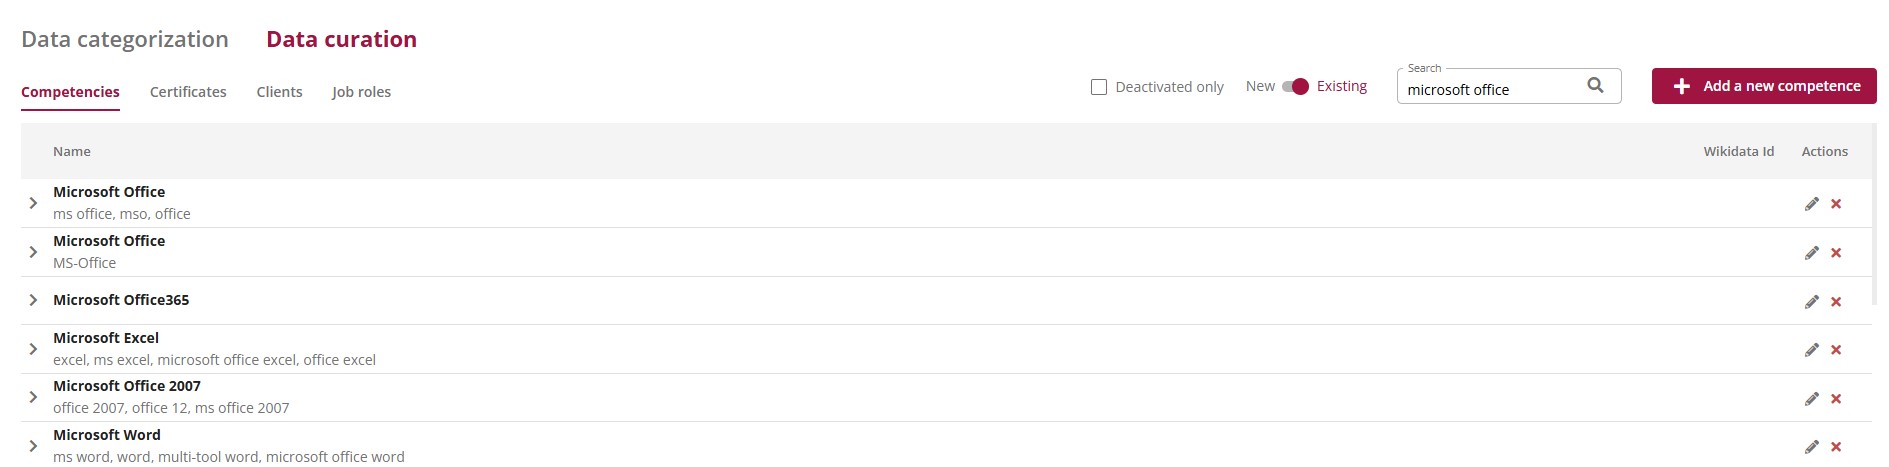
Figure 41: Searching existing terms
Editing Skills
For editing skills click on the button “Edit item”, also marked with a pecil.
The following window will be displayed with the data already available.
As soon as data is changed, the “Save”-button is activated and can be clicked to save the changed data.
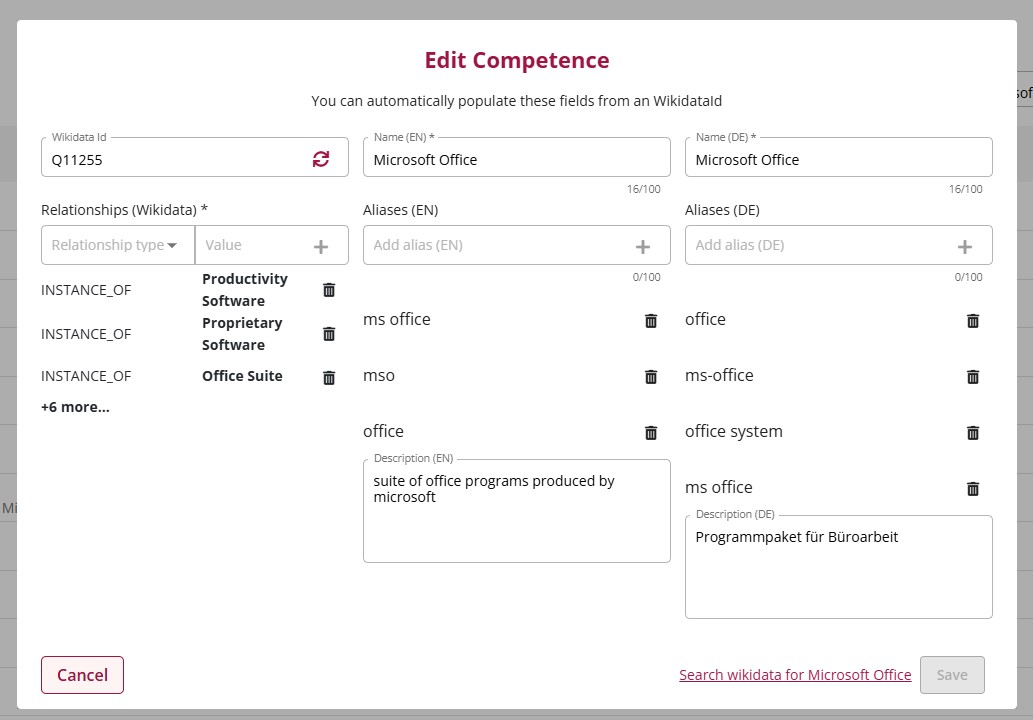
Figure 42: Data Curation – Editing Skills
Editing Certificates
The edit screen for certificates looks like this.
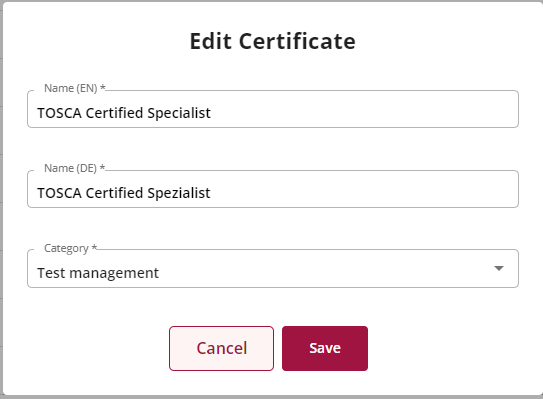
Figure 43: Data Curation – Editing Certificates
Editing Clients
For clients also the logo can be changed / added. If it’s available in wikidata.org it’s already loaded when adding the new client.
If the client was added before making the link to wikidata.org available, the data including the logo can be reloaded be adding the wikidata-ID and reloading the data.
If necessary the logo can be added, deleted or changed.
For this click on the logo. For deleting the logo click on the wastebin on the right. For changing or uploading a logo click on the pencil on the left.
The logo is shown in the project part of the profile and can be exported in the profile export.
After all changes are done click on the “Save”-button to save all changes.
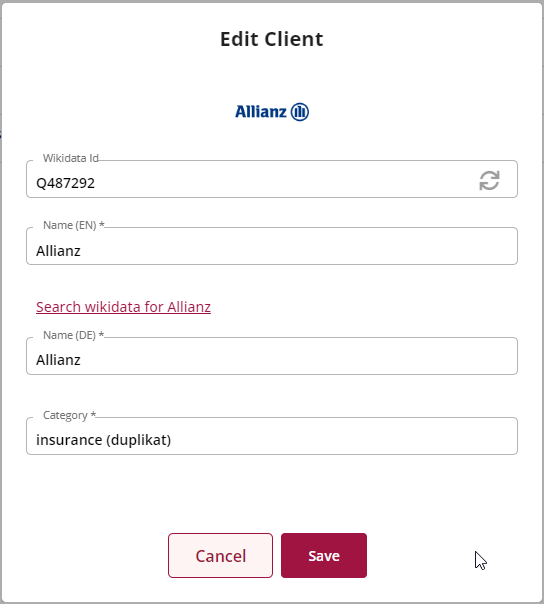
Figure 44: Data Curation – Editing Client
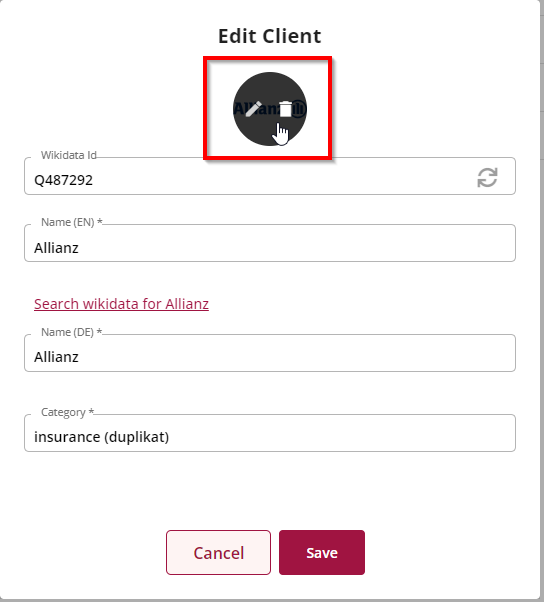
Figure 45: Data Curation – Editing Clientlogo
Deactivating Terms
If there are duplicates or obsolete terms (skills, certificates, clients) the data curator needs to be able to remove them from the ontology.
There is no physical removal from the ontology, the term will only get a flag that it’s deleted, and it will not be shown in any selection screen anymore.
Deactivated terms which are still used in the profile management are shown as striked through (strike through). This is a signal for the user to remove this term from the profile and if necessary, use the correct one.
Deactivate and Re-activate Term in Data Curation
To deactivate an existing term, eg. a skill, go to the Data Curation Screen.
Select “existing terms” and search for the relevant skill.

Figure 46: Data Curation – existing skills
To deactivate this skill, klick on the red cross on the right side.
The following warning message will be displayed:
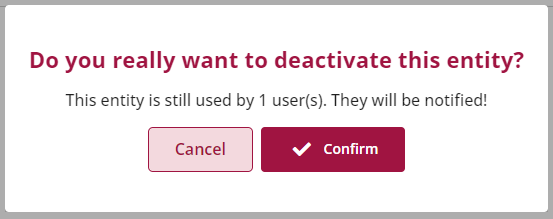
Figure 47: warning message to confirm deactivating a term
After confirming this notification, the skill will be deactivated.

Figure 48: Data Curation after deactivating a term
If the term was deactivated by mistake or if the term needs to be reactivated for other reasons, klick on the green circle arrow.
After that the term is active again.
Display of deactivated Terms in Profile Management
Before deactivating a skill, the profile would look like this:
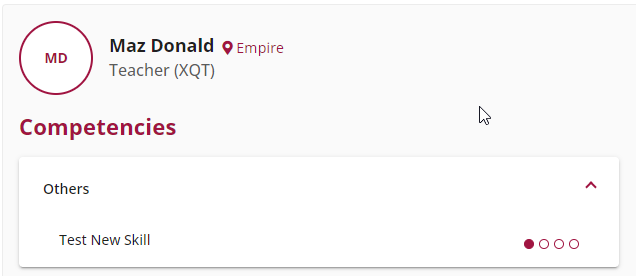
Figure 49: active skill in profile
After deactivating the skill it looks like this:
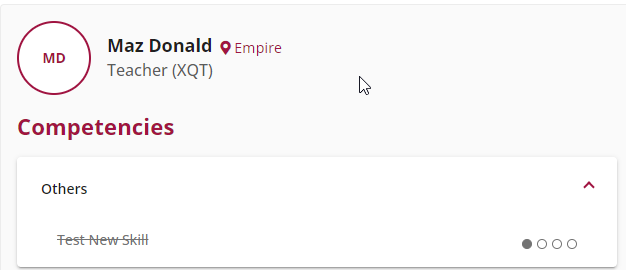
Figure 50: deactivated skill in profile
According to skills, other deactivated terms are shown like this:

Figure 51: deactivated certificate in profile
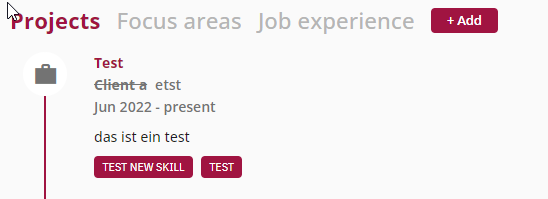
Figure 52: deactivated client in profile (projects)
Remove deactivated Term from Profile
Remove Skill
Click on “Edit Skills” (see chapter above).
The following window will be shown. Deactivated skills are shown here striked through, too. To delete the skill, mouse over the skill and click on the trash can.
Adding new skills to the profile works the same as described in a chapter above.

Figure 52: remove deactivated skill from profile
Certificates can remove in a similar way: edit profiles and remove the deactivated ones. Add new ones as required.
For clients in projects, it works a bit differently. Here you need to replace the client with the correct one or remove the client altogether.
Otherwise you can’t save any changes in the project.